pinterest google instagram
Powered by Blogger.

Lou Loves

New post every Sunday

Hey everyone,

I'm back!!! You probably won't know this but I have had a big 1 month break from blogging - now, I know what you're thinking... I uploaded every single day for Blogmas but, all of those posts were prewritten. I have thoroughly enjoyed my break but I'm really ready to jump back into blogging. Originally, I said I was going to upload a What I got for Christmas post. But, when I was thinking about the post, I thought how many people actually did that post and I wanted to do something a little different. As my blog is mainly beauty related, I thought that I'd share with you the make up bits I got for Christmas and what my first impressions of them are!

Brushes:


The first thing I got was the Real Techniques Powder Brush. This brush is so soft, even though it is a really fluffy brush, the density is perfect for picking up the right amount of product! Unlike some other brushes from Real Techniques, this brush didn't moult at al. Some of my other brushes moulted a little when I first got them, but this one's bristles are still firmly intact! So, this brush is definitely on the way to be being my favourite brush of all time!


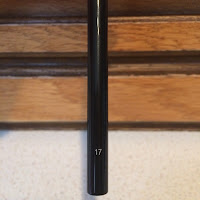
The eyeshadow brush I got was the NYX 17 brush. This brush is perfect for applying shadow into the crease. I then blend it out my Real Techniques Deluxe Crease Brush - this duo is a blending dream team! The quality of this brush is really good as well, I've never tried brushes from a make up brand before, but this one is incredible, I'll definitely be purchasing more NYX brushes!

This last "brush" isn't actually a brush. It's the Real Techniques Miracle Complexion Sponge. Before I had the Primark PS Pro Blending Sponge, which I used to think was really good, but after using this, I won't go back to it! I used to be confused by the major price difference between beauty blenders, but know I can definitely see why there is a price difference, and I think it definitely shows in the quality of application.

Make up:


Going back to the subject of NYX, I also got two of the hot singles shadows - one in 19 Innocent and the other in 22 Chandelier. Chandelier was to put in my create a palette, as I felt like velvet - the shade I used to have in my palette - didn't really fit with the other shades. It's a gorgeous cool toned taupe and is gorgeous on it's own, or built up with a shade in the crease. Innocent on the other hand, is a warm toned copper shade that is absolutely gorgeous in any look! Also, the packaging of them is pretty similar to the MAC ones, but are so much cheaper!


To go with the powder brush, I got the Rimmel Stay Matte powder. I have the shade 001 Transparent which is perfect for setting your make up without it being to cakey and look like you're drowning your makeup in powder! This applies really evenly and I'm really happy with it so far!


A lip product I got was the Tanya Burr Matte Lip in Martha Moo. This is probably one of Tanya's most sort after shades,so I'm really happy that I've actually got my hands on it! It's a gorgeous dark pink shade but it's still quite a vibrant side to it too! I can't think of any other shade to compare it to! The packaging is also matte which I love - it just makes it look so much more sleek.


The final product I got was the MAC lipstick in mehr. I actually picked this shade out, it's a gorgeous pinky nude shade that goes with any look. It also has blue undertones so it makes your teeth look whiter, which is always a bonus! This is one of the matte lipsticks but it isn't drying like some other matte lip products, however like all matte lipsticks they do apply better with a lip balm on underneath.

So, I hope you enjoyed this slightly different what I got for Christmas post, and I will see you all again in the new year!

Love Lou
xxxxx
December 30, 2016 No comments

Hey everyone,

I'm currently enjoying a lovely Christmas with my family and I hope you are too. I thought I'd just quickly pop on here and wish you all a very Merry Christmas, and I will see you all on the 30th with a What I got For Christmas post.

Love you all so much, and thank you so much for all of the support throughout Blogmas!!

Love Lou
xxxxxxx
December 25, 2016 No comments

Hey everyone,

Todays the last day of Blogmas :( But, it's not e=over yet, so enjoy this recipe for Snowman Cookies! xx

Ingredients (Makes up to 24 biscuits) :

200g Self Raising Flour
100g Caster Sugar
100g Butter, plus extra for greasing
1 large free-range egg, lightly beaten
1 tsp. of vanilla extract
 
White and Blue Fondant Icing
White and Black Writing Icing
Sprinkles
Chocolate Chips
 
Preheat the oven to 180C/350F/Gas 4.
 
Mix the flour and sugar together in a bowl, then rub in the butter with your fingertips until the mixture resembles fine breadcrumbs.
 
Add the egg and vanilla essence and mix to form a soft dough.
 
Roll out onto a well-floured work surface and cut into rounds. Place on greased baking sheets and bake for 10-12 minutes, or until golden brown.
 
Cool on a wire rack. When completely cool decorate.
 
Roll out the white fondant icing and cut out circles the same size as the biscuits, brush the backs of the circles with a little cooled boiled water and stick them to the biscuits, smoothing down the icing as you stick it on.
 
Roll out the blue icing and cut out more circles, then cut these in half and using a little more water and stick on top of the white icing for the hats.
 
Brush the hats with water in places where you want the sprinkles to stick and then sprinkle!
 
Pipe decorations on the hat with the white writing icing, then pipe a small blob for the hat bobble and another for the nose – stick on the chocolate chips. Pipe black eyes and mouth then leave to set.
 
So, I hope you've all enjoyed Blogmas, I love you all so very much, have a fabulous Christmas and I will see you again on the 30th.
 
Love Lou
xxxx
December 24, 2016 No comments

Hey everyone,

Tomorrow is the last day of Blogmas :( but lets enjoy it whilst we can!! Enjoy! xx

Ingredients:

150ml of Full-Fat Milk
3 tbsp. of Black Treacle
225ml of Vegetable Oil
375g of Plain Flour
3 tsp. of Baking Powder
1 and 1/2 of Bicarbonate of Soda
375g of Light Brown Soft Sugar
1 and 1/2 tsp.  of Ground Cinnamon
1 and 1/2 tsp. of Ground Ginger
30ml of Buttermilk
3 Large Eggs
1 and 1/2 tsp. of Vanilla Extract

350g of Lightly Salted Butter
600g of Icing Sugar
300g of Full-fat Cream Cheese
2 tsp. of Vanilla Bean Extract
200g of Smooth Caramelised Biscuit Spread
50g of Desiccated Coconut
Edible Silver Glitter
Gingerbread shapes (Gingerbread men, etc.)

Measure the milk and treacle in a saucepan. Bring to a gentle simmer, and stir well to combine, set aside to cool. Grease 3 20cm Loose Bottomed tins.

Preheat the oven to 180 C/160 Fan/ Gas Mark 4.

Measure the flour, baking powder, bicarbonate of soda, sugar and spices into a large bowl, then add 1/2 tsp. of fine salt. Mix the dry ingredients together with a large whisk; if there are any lumps of sugar, squeeze them through your fingers until you have an even, sandy-textured mixture.

In a jug, whisk the oil, buttermilk, eggs and vanilla. Add the milk and treacle mixture, and mix well. Pour the wet ingredients into the dry, and whisk into a smooth batter. Divide between the tins and bake for 25-30 minutes until a skewer inserted into the centre of the cakes comes out clean. You may have to swap the cakes over to cook evenly, but don’t do this until they’ve had at least 20 minutes cooking. Cool the cakes in their tins for 10 minutes, then transfer to a wire rack and leave to cool completely. Once cooled, you can wrap the sponges in cling film and store in a cool place for 4 days, or freeze for up to 2 months.

To make the icing, put the butter and half the icing sugar in a large bowl. Mash together roughly with a spatula, then whizz with an electric hand whisk until smooth. Add the remaining icing sugar, the cream cheese, vanilla bean extract and biscuit spread. Mix again until smooth and evenly mixed. Transfer half the icing to another bowl and set aside. Use the remaining icing to stack the cakes and cover the entire outside in a thin layer – don’t worry about making the cake look too neat at this stage, as any crumbs trapped in the icing will be covered in the final coat. Chill the cake for 30 minutes and the remaining icing for 20 minutes (remove the icing from the fridge 10 minutes before the cake to soften a little).

When the icing on the cake is firm, remove it from the fridge and use the remaining icing to cover the cake. Smooth the sides using a palette knife, but leave peaks and dips on top for your snow scene. Top the cake generously with desiccated coconut, a dusting of sieved icing sugar and some edible glitter, if you like, then decorate the top and sides with gingerbread shapes. If you’re not eating the cake within a few hours, store it in the fridge, but bring back to room temperature before serving. The cake will keep for 2 days.

So, I hope you all enjoyed this post, and I will see you all again tomorrow, for the last day of Blogmas :(

Love Lou
xxxx
December 23, 2016 No comments

Hey everyone,

Today I'm sharing with you a recipe for the perfect Christmas Eve snack! Enjoy these Reindeer cookies everyone! xxx

Ingredients (Makes 10) :

250g of Butter, softened
150g of Golden Caster Sugar
1 Egg
2 tsp. of Vanilla Bean Paste

350g of Plain Flour
1/2 tsp. of Bicarbonate of Soda

Red smarties
Chocolate chips
Chocolate covered pretzels
Icing sugar

Preheat the oven to 180 C/350 Fan/Gas Mark 4. Line two baking trays with greaseproof paper.

Cream together the butter and sugar, until light and fluffy, add the egg and vanilla paste, then mix in the flour and bicarbonate of soda to form a dough.

Roll out the dough on a floured to 1/2 cm thick. Use a knife to cut out a 'blunted' triangle to form the reindeers head. Transfer the cookies to the baking trays and bake for 10-12 minutes (until golden in colour)

Whilst still warm, press a red smartie at the bottom for a nose, followed by two chocolate chips for the eyes and two chocolate pretzels for antlers. Dust with icing sugar for a snowy effect.

Thank you so much for reading, and I will see you all tomorrow,

Love Lou
xxxx
December 22, 2016 No comments

Hey everyone,

Blogmas is nearing an end but that doesn't mean the posts are getting any less festive! Today I'm sharing with you the recipe for a festive yule log! Enjoy - xxx!

Ingredients (Serves 10-12) :
A standard Swiss Role tin

4 Large Eggs
140g of Golden Caster Sugar
60g of Self Raising Flour
50g of Cocoa Powder

250ml of Double Cream
250g of Dark Chocolate
Icing Sugar to decorate

Preheat the oven to 200 C/400 Fan/Gas Mark 6. Line the Swiss role tin with greaseproof paper.

Whisk the eggs and sugar together until light and fluffy. Sift in the flour and cocoa powder into the eggs and mix until smooth and combined. Pour into the Swiss roll tin and bake for 8-10 minutes.

Turn the cake out onto a clean piece of greaseproof paper and unpeel the paper from bottom.

Score a shallow line from the bottom of the sponge, being careful not to cut all the way through. Roll up the cake tightly, starting from the scored line. Leave to cool in this position completely.

While the sponge is cooling, make the ganache. Heat the cream in a saucepan until it starts to bubble at the edges. Take off the heat and stir in the chocolate until it's fully melted. Leave to cool completely.

For the filling, whip the double cream to soft peaks. Unroll the cake and spread the cream evenly over it.

Carefully roll the sponge up again as tightly as possible and leave it with the crease at the bottom.

Spread the ganache over the roll with a palette knife, making lines with a fork to resemble bark. Finish with a sprinkling of icing and maybe a sprig of holly or two. You could even scatter some chocolate shavings at the bottom to make it look like peeled bark.

So, thank you so much for reading, and I will see you all again tomorrow,

Love Lou
xxxx
December 21, 2016 4 comments

Hey everyone,

Today I'm sharing with you a recipe perfect for a Christmas Party - you can't go wrong with a Super Duper Chocolate Cake. Enjoy! xxx

Ingredients (Serves 10 -12) :

21cm Round Cake tins x3

200ml of Full Fat Milk
100g of Dark Chocolate
300g of Plain Flour
75g of Cocoa Powder
3 tsp. of Baking Powder
1 and 1/2 tsp. of Bicarbonate Soda
375g of Caster Sugar
200ml of Vegetable Oil
3 Large Eggs
200g of Greek Yoghurt
2 tsp. of Vanilla Extract

200g of White Chocolate
250g of Salted Butter
600g of Icing Sugar

Chocolate Shavings

Preheat the oven to 180 C/350 Fan/Gas Mark 4. Line all 3 cake tins with greaseproof paper.

Put the milk in a pan and bring to simmering point. Take off, the heat, add the dark chocolate and leave to melt. Mix until well combined.

Mix the flour, cocoa powder, baking powder, bicarbonate of soda and sugar in a bowl.

In a separate bowl, whisk the oil, eggs, yoghurt and vanilla extract. Slowly add the chocolate mixture and stir until well combined. Then fold in the dry ingredients and mix until a smooth batter.

Divide the mixture evenly between the cake tins and bake for 18-20 minutes. Transfer the cakes onto wire racks to cool.

To make the icing, first melt the white chocolate in a bowl set over a pan of simmering water, making sure the bottom of the bowl isn't touching the water. In another bowl, whisk the butter and icing sugar until smooth and light, then add the melted chocolate and stir well until combined. Layer the cakes on top of each other with icing and add some to the top, then decorate with chocolate shavings.

Thank you so much for reading and I will see you all tomorrow,

Love Lou
xxxx
December 20, 2016 No comments

Hey everyone,

Welcome back to 7 days of Christmas baking! Today I'm going to be sharing a recipe with you that would be perfect for last minute gifts. It's Salted Chocolate Truffles - enjoy! xxx

Ingredients (Makes 20):

300ml of Double Cream
330g of Dark Chocolate
A bit of Butter
1 tsp. of Sea Salt

Cocoa Powder
Chopped Hazelnuts
Chopped Pistachios
Edible Gold Glitter
Popping Candy
Freeze Dried Raspberries
Desiccated Coconut
Ground Coffee Beans
Hundreds and Thousands

Heat the cream over a medium heat in a pan until bubbles begin to form at the sides.

Whilst it's heating, break the chocolate up into pieces and place in a large bowl.

When the cream is ready, add a bit of butter and stir until melted.

Pour the hot mixture over the chocolate and stir until it's all melted and combined. Add the salt and mix through, then put in the fridge for at least 2 hours.

About 30 minutes before you are ready to make your truffles, take the mixture out of the fridge so it has warmed slightly.

Pop all your preferred toppings into separate bowls and have a plate at the ready to put the truffles on.

Use a teaspoon to scoop up the chocolate and use your hands to form 2cm truffles. Roll them in your topping of choice and ensure each one if fully coated, then put onto the plate. Keep them into the fridge until it's needed.

So, I hope you all enjoyed this post, and I will see you all tomorrow for day 3!

Love Lou
xxxx

I'd love to see you recreate this recipe, so if you do, post a picture on instagram and tag me - @louloves01 - and #bakingwithlouloves01.
December 19, 2016 2 comments

Hey everyone,

Welcome to Blogmas Baking Week! From today until 24th I am going to be sharing a recipe with you all every single day! Today's recipe is for edible Christmas tree decorations. Enjoy - xx!

Ingredients (Makes about 40) :

Christmas Cookie Cutters
Ribbon or String
Piping bag with a fine nozzle

150g of Unsalted Butter
150g of Dark Muscovado Sugar
2 Eggs
3 tbsp. of Golden Syrup
400g of Plain Flour
1 tsp. of Baking Powder
1 and 1/2 tsp. of Ground Cinnamon
1/2 tsp. of Ground Nutmeg
1/2 tsp. of Ground Ginger

200g of Icing Sugar
1 tsp. of Vanilla Extract

Preheat the oven to 180 C/350 Fan/Gas Mark 4. Line two baking trays with greaseproof paper.

Cream together the butter and sugar until light and fluffy. Add the eggs and golden syrup and combine well, then mix in the flour, baking powder and spices to make a smooth dough.

Roll out the dough on a floured surface to a thickness of 3-4mm. Cut out with any Christmas cookie cutter of your choice and keep going until you've used up all of your dough, arranging them on baking trays as you go. Using a straw, poke out a hole in each biscuit.

Bake for 10-12 minutes until golden. Whilst the biscuits are still hot, poke through each hole again with the straw as some will have closed while baking. Transfer to a wire rack and allow them to cool completely.

Mix 1 tablespoon of warm water at a time into the icing sugar, add the vanilla extract and stir until you have think pipeable icing. Transfer to a piping bag with your thinnest nozzle, and decorate your cookies.

When the icing has set, string ribbon or string through each hole and hang on your tree!

So, I hope you all enjoyed this post and are looking forward to the next 6 recipes! I'll see you all tomorrow,

Love Lou
xxxxx

I'd love to see you recreate this recipe, so if you do post a picture on instagram and tag me - @louloves01 - and use #bakingwithlouloves.
December 18, 2016 No comments

Hey everyone,

I love doing a good Secret Santa, so today I thought I'd share with you some of the bits I've found that would be perfect as Secret Santa gifts! Enjoy! xxx


First up is the Boots Apple Crumble Scented Candle. Candles are a Christmas classic and this one smells so good! I've never seen any other scent like this so it's quite a different scent to anything else they might have! This is perfect for any candle loving person and it retails at just £5!!!

Soap and Glory gift sets are a favourite of mine and their Christmas collection is amazing! And this year is no exception. One of my favourite is the Full Sparks Set. This contains one miniature size of the Righteous Butter and a mini Sexy Mother Pucker lip gloss in the shade Candy Queen. I love the soap and glory products and the quality is incredible so this set is sure to go down a treat. And, as it retails at £6 you'll love it as well!


Soap and Glory Pink Twice set is another absolutely gorgeous set! This has two minis of Hand Food and Heel Genius. I have used both of these products and I absolutely loved them so this is perfect for the people who love hand creams etc. and it retails at just £5 which is great for the quality. I love the fact you have a Heel Genius mini as you can't actually buy that by itself so it's perfect for going travelling.


The Baylis and Harding Sweet Mandarin and Grapefruit Foot Set looks incredible. I have tried some products from Baylis and Harding before and they were amazing and the fluffy socks stay really fluffy for years! This set has a soothing scented foot lotion and super fluffy socks!This is probably my favourite of all the ideas in this post because I know how good the products are and for just £6 this is a bargain!!

Thank you so much for reading, and I will see you all tomorrow, for the start of 7 days of baking!!

Love Lou
xxxx

*None of these photos are my own. They were all found on www.google.com *
December 17, 2016 No comments

Hey everyone,

I love decorating my room, especially at Christmas time, so I thought I'd share with you some of the ides I've had to decorate my room! I hope this gives you some ideas! Enjoy! xx


Love Lou
xxxxx
December 16, 2016 2 comments

Hey everyone,

The idea for this post came to my a few weeks ago and I love it! I've taken tons and tons of pictures around my house with all the Christmas Decorations so I thought I'd share them with you all! Enjoy- xx!


Thank you all so much for reading and I will see you all again tomorrow,
 
Love Lou
xxxx
December 15, 2016 3 comments
Newer Posts
Older Posts

About me

Hey! I'm Lou and welcome to my cosy little corner of the internet! I cover everything from the trends of the season to my favourite recipes! Have a look around and don't forget to follow me via the social media links below!

Follow Me

Labels

Advice Baking Bath/Shower Beauty Blogging Blogmas Cooking Empties Fashion Favourites Hauls Homeware Instagram Lifestyle music Other Review Skincare Sponsored Summer Tags Travel

recent posts

Blog Archive

  • ►  2018 (32)
    • ►  September (1)
    • ►  August (3)
    • ►  July (2)
    • ►  June (4)
    • ►  May (3)
    • ►  April (5)
    • ►  March (4)
    • ►  February (4)
    • ►  January (6)
  • ►  2017 (141)
    • ►  December (25)
    • ►  November (8)
    • ►  October (5)
    • ►  September (6)
    • ►  August (9)
    • ►  July (10)
    • ►  June (13)
    • ►  May (14)
    • ►  April (12)
    • ►  March (14)
    • ►  February (12)
    • ►  January (13)
  • ▼  2016 (168)
    • ▼  December (26)
      • First Impressions - Make up bits I got for Christmas!
      • Blogmas Day 25 : MERRY CHRISTMAS!!!!
      • Blogmas Day 24 : Snowman Cookies
      • Blogmas Day 23 : Gingerbread Cake with Caramel Bis...
      • Blogmas Day 22 : Reindeer Cookies
      • Blogmas Day 21 : Festive Yule Log
      • Blogmas Day 20 : Super Duper Chocolate Cake
      • Blogmas Day 19 : Salted Chocolate Truffles
      • Blogmas Day 18 : Edible Christmas Tree Decorations
      • Blogmas Day 17: Secret Santa Gift Ideas
      • Blogmas Day 16 : Christmas Room Inspiration!
      • Blogmas Day 15: A Christmas at my House!
      • Blogmas Day 14 : Christmas Tag!
      • Blogmas Day 13 : Mince Pies
      • Blogmas Day 12: Yankee Candle Christmas Collection
      • Blogmas Day 11 : Lush Christmas Collection
      • Blogmas Day 10: A Festive Make up Look
      • Blogmas Day 9: These Are A Few Of My Favourite Thi...
      • Blogmas Day 8: My Winter Skincare Routine
      • Blogmas Day 7 : How Much is My Face - Christmas Look
      • Blogmas Day 6: A Christmassy Montage!
      • Blogmas Day 5: DIY Gifts
      • Blogmas Day 4 : Festive Pamper Routine!
      • Blogmas Day 3: Christmassy Q and A!
      • Blogmas Day 2 : Top 5 gifts under £10!
      • Blogmas Day 1 : Gingerbread Pudding!
    • ►  November (12)
    • ►  October (13)
    • ►  September (13)
    • ►  August (16)
    • ►  July (12)
    • ►  June (10)
    • ►  May (14)
    • ►  April (12)
    • ►  March (14)
    • ►  February (12)
    • ►  January (14)
  • ►  2015 (78)
    • ►  December (20)
    • ►  November (12)
    • ►  October (20)
    • ►  September (22)
    • ►  August (4)

Report Abuse

Translate

Pages

  • Home
  • Advertising
  • Contact Me
  • Privacy Policy

My Bloglovin'

Follow

Created with by ThemeXpose | Distributed By Gooyaabi Templates